


Magnifier + Flashlight

Magnifier + Flashlight का विवरण
<b>Please watch the teach video to know how to use it.</b>
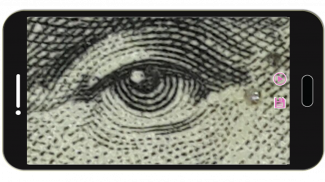
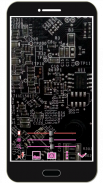
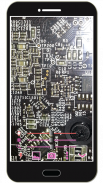
Let your phone become a perfect magnifier.
When you start camera, the APP will set the zoom to middle value. You can drag zoom seek bar to zoom in or out.
When you start camera, the APP will auto detect the micro focus mode. If it exist, the APP will auto set to micro focus mode. If it doesn't exist, the APP will set to auto focus mode.
You can do the following change to do other settings:
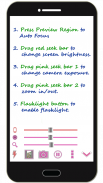
1. Press preview Region to focus.
2. Drag red seek bar to change screen brightness.
3. Drag pink seek bar 1 to change camera exposure.
4. Drag pink seek bar 2 to zoom in/out. (Or use two finger zoom in/out on preview screen)
5. Press the flashlight button to enable flashlight.
[Others]
1. You also can take a picture if you wish.
2. When focus, the focus area of the image please select the best color change much. If you click on the region are biased in favor of a single color, it is not very good focus. In addition, the lens remains clear, wipe clean the glass will be better focus. And turn on the flashlight also can get a better focus.
【Recommended External Editor】
( aillis - Filters & Stickers )
https://play.google.com/store/apps/details?id=jp.naver.linecamera.android
This APP is now tested more compatible. They support external photo edit more user friendly.
Or you can use system photo editor, it also work. (Test on Samsung Phones.)
【PS】
Please like us on Facebook. Give us the power of love.
<a href="https://www.google.com/url?q=https://www.google.com/url?q%3Dhttps://www.facebook.com/jkfantasy%26sa%3DD%26usg%3DAFQjCNEclX_HVmvn0uJKmVBy9sQGefMRjQ&sa=D&usg=AFQjCNFCIKuXgH9R6prFNmRAgadsDbUUzA" target="_blank">https://www.facebook.com/jkfantasy</a>
</div> <div jsname="WJz9Hc" style="display:none"><b> इसका इस्तेमाल करने के लिए पता करने के लिए सिखाना वीडियो देखने के लिए धन्यवाद।
अपने फोन को एक आदर्श ताल बनने दो।
आप कैमरा शुरू, एपीपी मध्य मूल्य के लिए जूम की स्थापना की जाएगी। आप ज़ूम ज़ूम इन या आउट करने के लिए बार की तलाश खींच सकते हैं।
आप कैमरा शुरू, एपीपी ऑटो माइक्रो फोकस मोड का पता लगाने जाएगा। यह मौजूद है, एपीपी माइक्रो फोकस मोड के लिए ऑटो की स्थापना की जाएगी। यह मौजूद नहीं है, एपीपी ऑटो फोकस मोड पर सेट हो जाएगा।
आप अन्य सेटिंग के लिए निम्न परिवर्तन कर सकते हैं:
1. प्रेस पूर्वावलोकन क्षेत्र से ध्यान केंद्रित करने के लिए।
2. खींचें स्क्रीन चमक को बदलने के लिए बार की तलाश लाल।
3. खींचें गुलाबी कैमरा जोखिम को बदलने के लिए बार एक की तलाश है।
4. खींचें गुलाबी में / बाहर ज़ूम करने के लिए बार 2 की तलाश है। (या पूर्वावलोकन स्क्रीन पर / दो उंगली बाहर ज़ूम का उपयोग करें)
5. प्रेस टॉर्च बटन टॉर्च सक्षम करने के लिए।
[दूसरों]
यदि आप चाहें तो 1. आप भी एक तस्वीर ले जा सकते हैं।
2. फोकस, छवि का ध्यान केंद्रित क्षेत्र बहुत अच्छा रंग परिवर्तन का चयन करें कृपया है। आप एक ही रंग के पक्ष में पक्षपाती हैं क्षेत्र पर क्लिक करते हैं, यह बहुत अच्छा ध्यान नहीं है। इसके अलावा, लेंस साफ रहता है, बेहतर ध्यान केंद्रित किया जाएगा कांच साफ साफ। और <font color="# 0000FF"> टॉर्च पर बारी भी एक बेहतर ध्यान प्राप्त कर सकते हैं।
【अनुशंसित बाहरी संपादक】
(Aillis - फिल्टर और स्टिकर)
https://play.google.com/store/apps/details?id=jp.naver.linecamera.android
यह एप्लिकेशन अब और अधिक संगत परीक्षण किया है। वे बाहरी फोटो संपादित अधिक उपयोगकर्ता के अनुकूल समर्थन करते हैं।
या आप सिस्टम तस्वीर संपादक का उपयोग कर सकते हैं, यह भी काम करते हैं। (सैमसंग फोन पर टेस्ट।)
【पुनश्च】
कृपया हमें फ़ेसबुक पर लाइक कीजिए। हमें प्यार की शक्ति दे।
<a href="https://www.google.com/url?q=https://www.facebook.com/jkfantasy&sa=D&usg=AFQjCNEclX_HVmvn0uJKmVBy9sQGefMRjQ" target="_blank">https://www.facebook.com/jkfantasy</a>
</font>
</b></div> <div class="show-more-end">


